
Transferring camcorder tapes to the computer is not a simple copy and paste thing. The data in camcorder tape is in analog format. For this reason, the transferring process is mechanical. The process requires that the camcorder play the data in real-time into the computer.
The traditional way is to connect the Camcorder to the computer directly. Usually, after the connection, editing software in the computer is activated to capture the data from the Camcorder. But many things have changed today, and the process requires more to complete. So let’s discuss how to transfer camcorder tapes to computer in detail below.
How to Transfer Camcorder Tapes to Computer
The process of transferring camcorder tape to the computer is straightforward, but you need to have the necessary materials. You need the appropriate cables, MiniDV playback device or camcorder, and a computer. Moreover, the computer must have the necessary ports to receive the connection of the camcorder. Also, you must ensure that your computer has enough space to receive the data when the streaming starts.
The processing power of the computer is another important thing to consider. The reason for this is that the tape is played in real-time on the computer during the transfer. For this reason, the computer needs to have enough resources to ensure that the streaming does not flicker but is steady. So, the quality of the transfer depends on how much RAM you have on your computer and the speed of the processor and hard drive.
The act of transferring analog tape to the computer is actually a conversion from analog to digital. When converting analog video to digital files, the file sizes are large, which takes up a lot of hard drive space. Although the large size of the file may make the system hang, the quality of the finished work may be lower than the analog data in the tape. The bottom line is that your computer must be strong enough for your camcorder tape transfer to be of high quality.
You are good to go with your camcorder tape transfer to the computer if you have all the necessary tools. You must also follow the procedure to the later. That’s why many people who want to know how to transfer camcorder tapes to computer opt for the perfect vintage camcorder. This is because it is easy to digitize. With that said, let’s discuss the process in detail.
What you’ll need
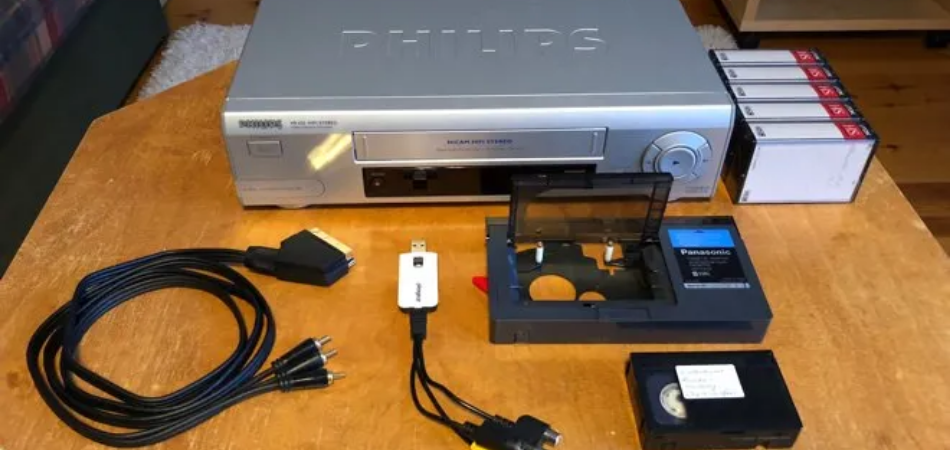
For you to be able to transfer your camcorder tapes to the computer, you need the following items:
- A functioning camcorder or MiniDV playback device.
- FireWire cable
- Capture Card
- Computer
- Video editing software
Steps to transfer camcorder tapes to computer
Before you start, please, ensure that all is set with your power source. The tape is analog, and the transfer process is analog to digital. So, you must not allow power to go off when your streaming or capture starts. Ensure that the computer capture card is appropriately configured with the manufacturer’s premium drivers.
The requirement is the same in either desktop computer or laptop. If you connect your camcorder or MiniDV playback device to the computer, it will be recognized automatically. If, after connection, no indication of recognition, then either the capture card is faulty or not properly configured. Taking the following simple steps will get you going with your camcorder tape transfer.
Step 1 – Camcorder and Tape preparation
Power on your camcorder and insert the tape you want to transfer into it. Remember to switch to play mode and rewind the tape to the beginning before you start transferring.
Step 2 – Get your computer and video editing software ready
Boot your computer and activate your video editing software. The video editing software will enable you to transfer your tapes because there is no copy and paste. There are different editing software. Some popular ones are Pinnacle, Adobe CS, Corel Video Studio, Sony Vegas, etc.
Step 3 – Make your connections.
Connect one end of the Firewire cable to the camcorder and the other end to the capture card in the computer. It does not matter whether you are using a desktop or laptop, MacBook or Windows. You can make do with any one of them.
It should be noted that it is not all computer systems that come with Firewire ports. If your system is a Desktop computer system, the best thing to do is to buy a Firewire card to install. On a laptop, just check to see if your laptop model has a PCMCIA or Express Card slot. Today, most laptops have memory card readers to support the latest high-definition cameras and camcorders.
Step 4 – Locate your streaming device on the computer
Navigate to the capture tab in your video editing software, navigate to the new media, and click on it. Clicking on it will take you down to where relevant available devices can be found. If your camcorder or MiniDV playback device is properly connected, you will see it. Click on it, and it will pop up where you will click the bottom that will start the streaming. That is it.
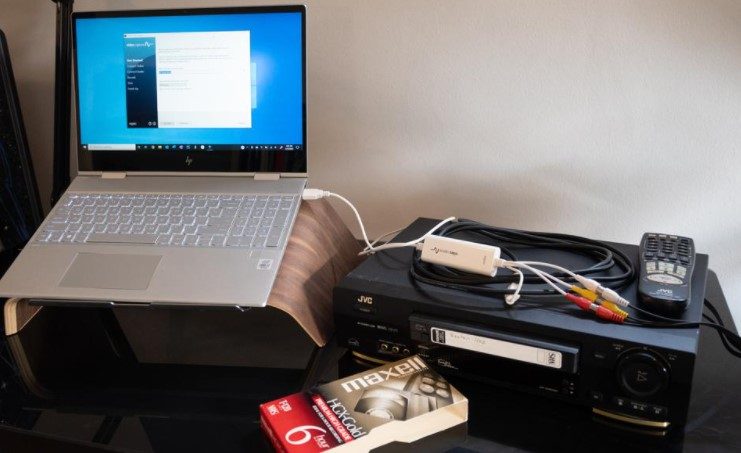
It is possible that you are not able to connect your camcorder to your computer directly using analog Firewire or USB. If that is the case, you can still connect your camcorder to the computer using an external video capture device. However, your camcorder must also have analog AV outputs. Taking the following steps will get you going without stress.
- Connect the AV out of your camcorder to the AV in of the capture device.
- Connect the USB out of the capture device to your computer USB port.
- Turn your camcorder on and switch it to the playback mode.
- Execute or activate the installed editing software in the computer
- Pay attention to all software prompts and read them carefully before you click anything.
- Navigate to the capture area of the editing software and click on import or start recording. When done, click on play on the camcorder. It’s that simple.
Final Words
As you must have seen in this article, camcorder tape transfer to a computer is not all about cable connection. The software aspect of it will require you to complete some tasks in the video editing software. You can complete the job yourself, but if you don’t have video editing software on your computer, then there is a problem.
A good vintage camcorder in its high quality and functionality, coupled with the ease of digitization, would lessen the task. Well, if your type or model is not a vintage camcorder, you can still scale through the exercise. But, even if you have, you need to know how to transfer camcorder tapes to computer with it. But if you have a problem with the software aspect of the exercise, you may need to get an assistant.