
Streaming games is the new craze. Gamers are looking for the smoothest option for streaming their favorite games. And, you must have the right component to stream.
What could be better than the PS4 Camera with its dual lenses! But you have to know how to use PS4 camera on PC to get the most control over it.
You’ll have to connect the PS4 camera to your PC through a USB adapter, install the driver files, and do some testing before going live with it.
Streaming, video chat, and web chats will be a new experience with the camera. So, let’s move into the discussion and see how it’s done.
What Is a PS4 Camera?
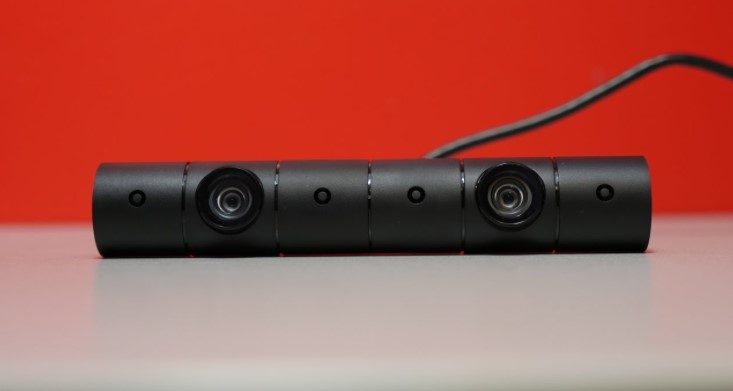
The PS4 camera is one of the best compatible webcam available in the market that requires a little tweaking to connect with the PC for high-quality streaming performance.
A little background
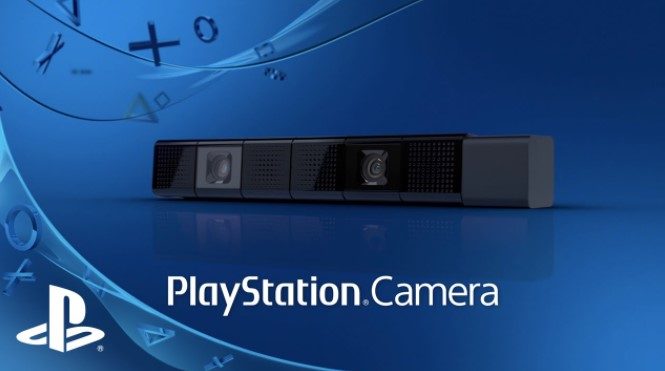
PlayStation4 is the successor of PlayStation 3. And, the upgrade not only improved its performance but also added new components. PS4 camera is the updated version and true successor of PlayStation Eye. Sony Computer Entertainment launched the latest PS4 in 2013.
The updated PS4 came into the market in 2016, and it turned out to be a major component for gamers and streamers. Live broadcasting, voice commanding, webchats, and many other things work perfectly by using the PS4 camera.
Since the first launch, it is still dominating in the console gaming industry. One of the phenomenal parts of the PS4 is its interactive camera for allowing game streaming, video chats during video games, and motion detection.
Impressive specs
PS Camera can capture photos and videos of 1280×800 pixels. It offers the modern benchmark like high-quality videos (720p resolution) with a dual camera lens. PS4 camera produces an 85-degree view with a 30cm distance. The aperture of the camera is f/2.0. Even, many modern-day smartphones do not have such configuration.
There is a tetra-channel microphone array to reduce background sounds. It is useful for getting voice commands. If you are loud and clear, a PC-connected PS4 camera can turn into a handy device for you.
Its main purpose was to track the Virtual Reality Headset that came with PlayStation 4. Thereby, a highly configured motion-detecting sensor is equipped with the camera. The camera can capture at a rate of 240FPS.
What you’ll need to Setup and Use PS4 Camera with PC?
Setting up the PS4 camera with a PC requires gathering some tools and applications. As the component is not supposed to work with a PC, there are some intermediary processes.
Connecting
First, check either your PC has an extra USB 3.0 port or not. A USB adapter is required for connecting the camera. This is mandatory as the camera requires connecting via the USB 3.0 port only.
Firmware and driver
The second thing is to download firmware and drivers from a trusted site. libusbK and OrbisEyeCam Driver are the two most trusted ones. You need only one of them. Burn it on the USB device or download it on your computer.
Putting the privacy
Now, you’ll need a privacy shield for protecting the camera lens of the PS4 camera. We highly recommend using the privacy shield to avoid getting any scratches. You know they are expensive and it is hard to find any replacement for them.
Mounting
A Clip Camera Mount for the camera is also a requirement for using the PS4 camera after setting with your PC. This is to provide stabilization as well as maximum security to the camera. The camera mount is the best option for streaming and live broadcasting.
If you are equipped with all the items, the preparation is done. Now, you need to follow some essential steps for using PS4 camera on pc.
Get to know:
How to Use PS4 Camera on Pc in Five Steps?
The process is easy, and you need to stick with the process for getting the best result from setting up the camera. We are approaching five steps to complete the process.
Step 1: USB 3.0 and the adapter
Remove the PS4 camera from the PlayStation Console. Now, connect the cable to the USB adapter. Now, you need to plug in the adapter to your PC’s USB 3.0 port.
Step 2: Device manager
Locate the Device Manager on your Windows computer. Click on the option, it will take you to the pop-up window. In the pop-up window, you’ll find several options. Locate and click on the USB Boot beneath the option “Other Device”.
Step 3: Installing files
In the previous portion of the article, we told you to burn drivers on USB or download them in your PC’s storage. In this step, you have to approach the downloaded files.
If you are planning to use the PS4 Camera with libusbK driver, you will need to get the driver from https://sourceforge.net/projects/libusbk/.
The following page will appear.
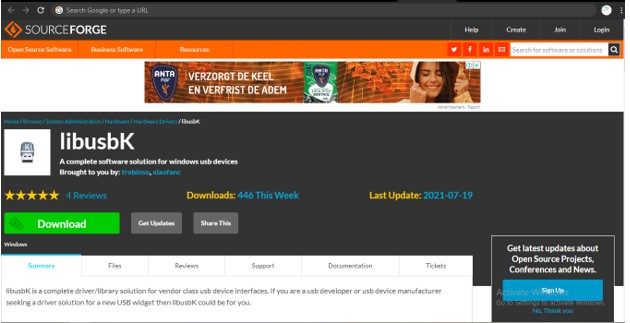
Click on download and all files will be downloaded to a specified folder. Run the .exe file and you are done.
OrbisEyeCam is also a popular driver for USB cameras. You’ll download from this link: https://github.com/psxdev/OrbisEyeCam. Download and run the executable file for getting the application on your computer. When the downloading process is over, install files and run the application.
Step 4: Test the camera
Once you install, load, and run firmware from previous steps, you are probably ready for running the first test. Go to the general camera setting. It is always helpful to locate the camera from Windows default settings. However, it is your choice. For live streaming on twitch, run the game and click the option “Live broadcasting”.
If you find yourself clearly on the screen, the PS4 profile is well set for use on the PC. However, in very few cases, the camera may not run even after following the above steps. You must seek professional help or expert advice. It may happen due to the adapter’s problem or the camera’s previous configuration.
Step 5: Live broadcasting
The article is not only about connecting and setting up the PS4 controller but also using it. For using the camera, run the game and log in to the Twitch account.
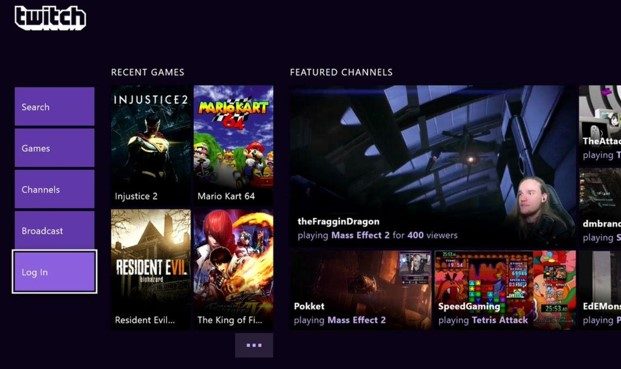
Your twitch account will show the option to broadcast. Now, set the camera on the clip or adjust it on the upper portion of the monitor. Ready the surrounding environment to use PS4 camera for streaming. Remember that there are microphones and you will stream very clearly.
Click on “share” and you are online!
When you’re at the final stage, the computer is well-equipped with the PS4 camera and its dual-camera lens. Bring out your favorite game noise and stream it online.
Conclusion
Quality always matters, and you cannot ignore the benefit of using a high-quality streaming camera. The PS4 Camera itself is a complement for gamers and streamers. Installing it on your pc will enhance the streaming and chatting experiences. Every popular game of this era requires having a strong communication channel.
Both video and audio streaming will be vital for enhancing the experience. With a PC setup, the outcome will be enormously enjoyable as you now know how to use PS4 camera on PC. Suggest the article to your nearby gamer friends and game at max quality. Happy streaming!