Lazy eyes can be an annoyance in any photograph. Not only does it make the subject look bad, but it can also bother photographers in their pursuit of perfect pictures.
So how to fix an inherent case of lazy eyes in the picture? The easiest way to do this is to use trusty photo editor software. With correct procedures via adobe, affinity photo, etc., you will be good to go.
Are you ready to know how exactly the software work? Well, you are in the right place to find your answers. All you need to do is scroll down and keep reading.
How To Fix Lazy Eyes In A Picture?
Lazy eyes or wandering eyes are a case of amblyopia. It can be found in anyone and is generally termed to be inherent due to genetics. The easiest way to fix a picture of a subject with lazy eyes is to use Photoshop software.
By now, most people might have already tried to use this software. But the limited usage that comes with free editions will not be able to help you. What you need are the tools that only come with a paid subscription.
We have compiled some of the common photoshop software that you can avail yourself and use to your benefit.
Using Adobe Photoshop
Adobe Photoshop is one of the most well-used software. Not only does it have an ample amount of tools, but it also comes with an easy-to-use UI for the users. The correct procedure for clearing lazy eyes has been shown below.
Step 1:Use Marquee Tool
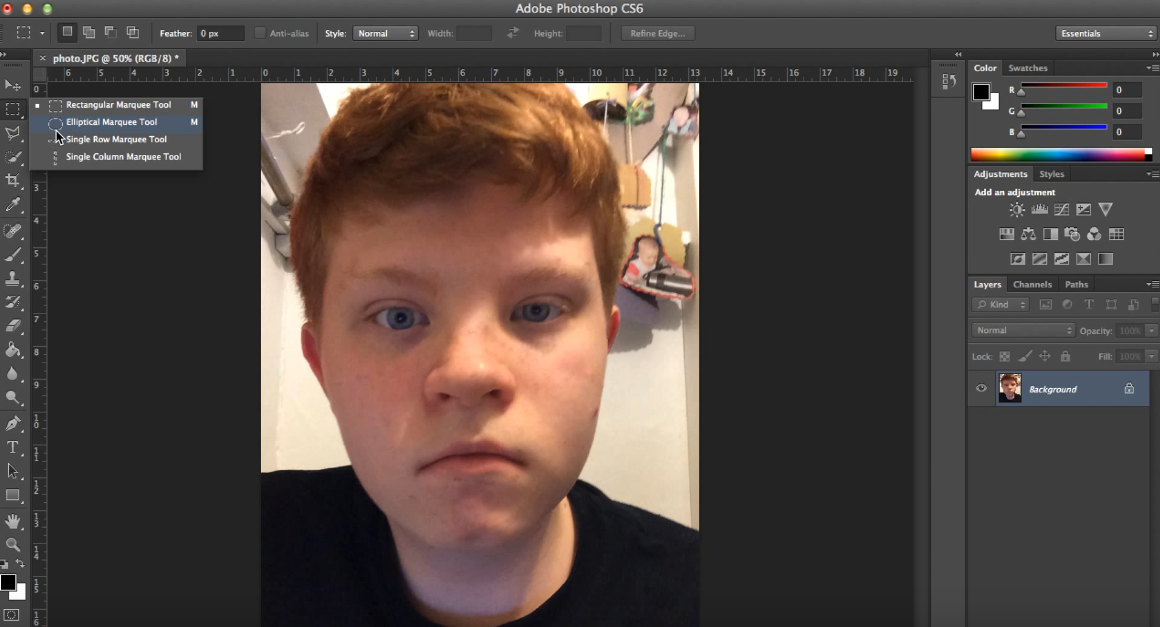
Use the marquee tool to select the upper part of the subject’s eye. Use the elliptical marquee option to select the entire eye that appears to be ok and not ‘lazy.’
Step 2: Copy and drag
Use Ctrl + C to copy the selected eye. Then drag the copied version over to the other eye. Paste the copied eye over the ‘lazy’ eye.
Step 3: Edit The Eye
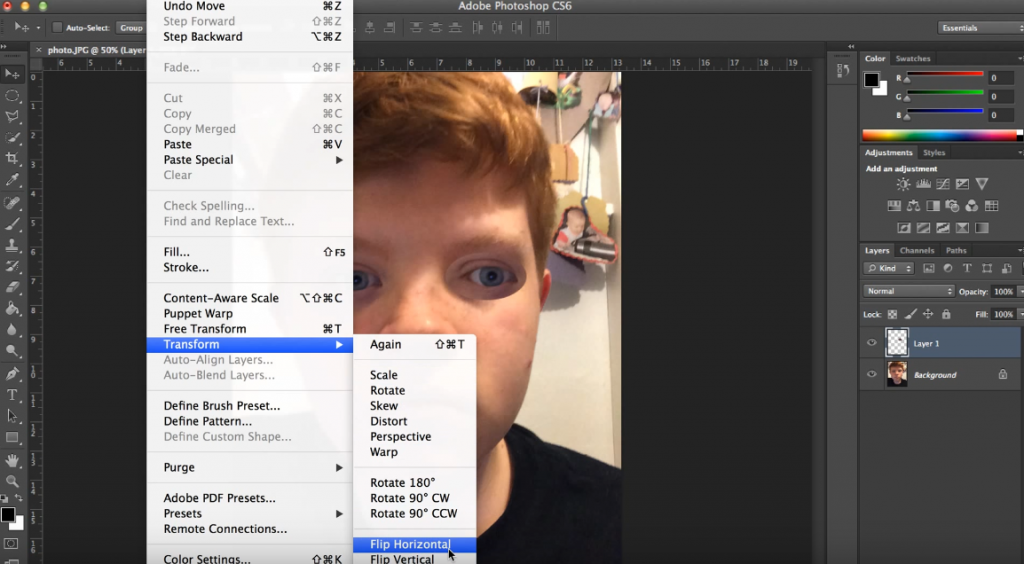
Left click at the top of the window and move your cursor to the transform option. Another drop-down menu will appear. Click on the horizontal flip option.
Step 4: Erase non-used areas
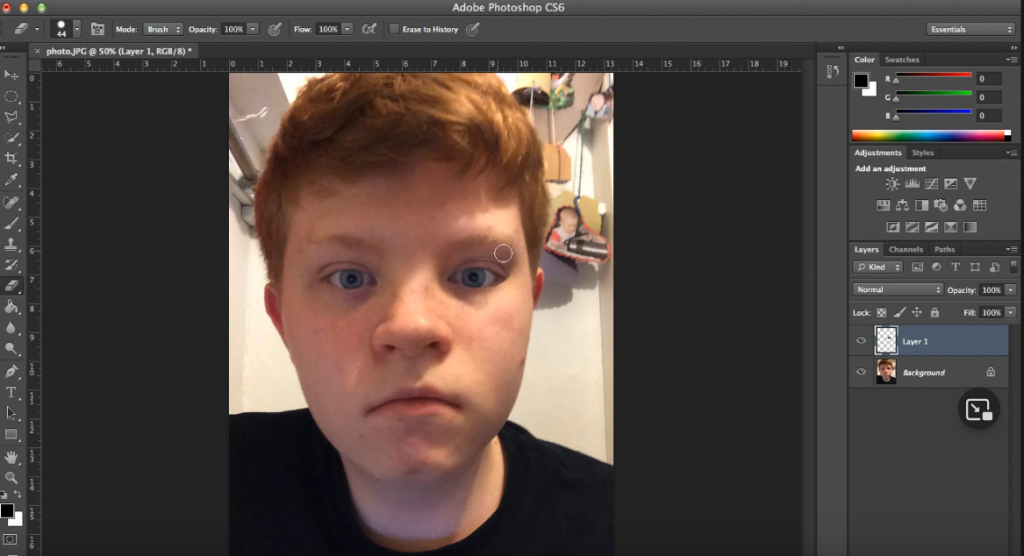
Hit the E button to get the erasure. Then remove all other non-used parts in the new eye to make it look as natural as possible. Add other finishing touches if required.
Using Affinity Photo
The second option you can get after adobe is to use affinity photo to edit the lazy eyes. Here’s how you can do this.
Step 1: Use Photo Persona
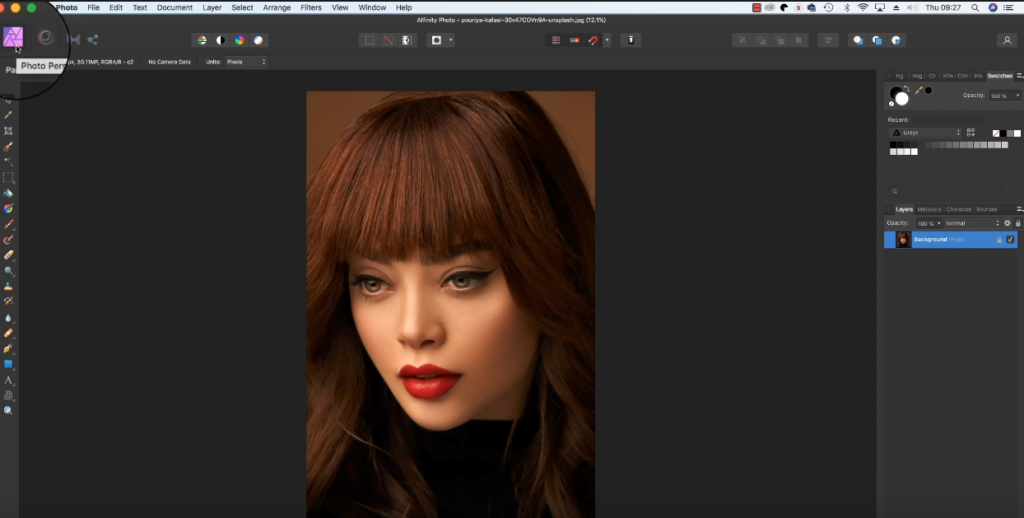
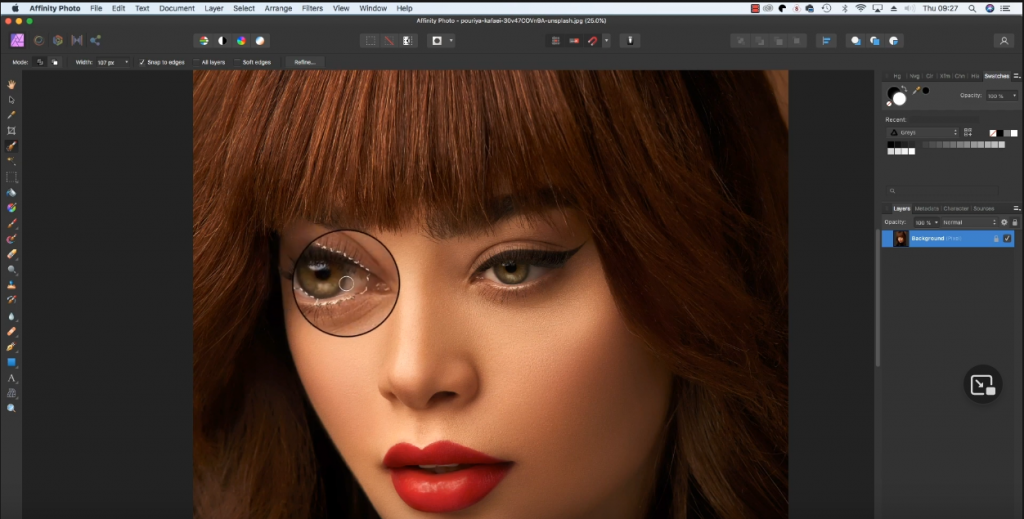
Get your photo open in the window of the affinity application. You can zoom in to get a good look at the subject’s eye. Then select the icon in the top left corner of your app, which is the photo persona.
Step 2: Use a Selection brush
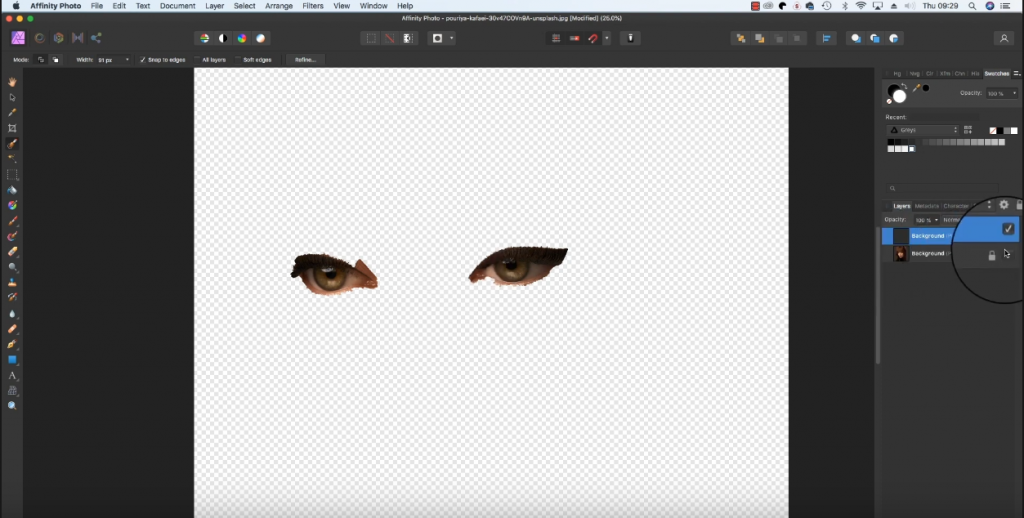
Use the shortcut W to activate the selection brush. Use the tool to click over the subject’s eyes. With the pixel selected, copy and paste them using Ctrl+C and Ctrl+V.
Step 3: Work On Under the layers
Use the bottom layer of the picture to edit the eyes properly. When you are done, set them up in the upper layer. Make sure the subject’s eyes appear as natural as possible.
Some Other Tools for fixing lazy eye in pictures
Aside from Adobe and Affinity Photo, there are several other photo editing software. These software/ applications serve the same purpose of fixing lazy eyes with the help of various tools and editing options. You can make your house from the list of popular photo editing software below:
- GIMP Photo Editor
- Luminar
- InPixio Photo Editor
- Picsart
Get to know: How to Remove Filters from Photos?
How To Avoid Lazy Eyes In-Picture?
While it is near impossible to fix a person with lazy eyes, you can still take measures to avoid the situation. Below, we have listed some of the points that you can take to avoid a subject with lazy eyes.
Changing The Posture Of the Subject
Posing or changing the posture of the subject is the easiest measure that you can take for a subject with lazy eyes. Any amateur model and photographer should be able to follow it up without any problem.
You can ask the subject to tilt in a certain direction or hide one side of the face. This should allow you to take the photo without exposing the side where the lazy eyes dominate.
Changing The Focus Of The Subject
Another common method that is simpler than changing the posture is to change the focus of the subject. You can ask the subject to look elsewhere and take pictures from one side.
It is understandable that this method might seem awkward at first as it is repetitive. However, at the end of the day, the result of the photograph will definitely be worth all of your trouble.
Change The Angle Of Shooting
The final option that you can follow is to change the angle from which you are shooting.
Angling might be limited to more professional photographers. However, they do work in masking the lazy eyes of the subject. As such, all photographers, even rookies, are advised to try it out.
For example, you can try to take photographs from above or below. Just make sure that the photograph that comes out appears to be acceptable and as natural as possible.
Conclusion
Now that we are at the end of this article, you might have already found what you were looking for. While we have given you some common ways to fix lazy eyes using software, they might not be accepted all the time.
As certain techniques that allow you to avoid the lazy eyes of the subject can be more helpful. Additionally, you should also know that there are several scenarios where you will be required to use your expertise. An example might be when dealing with restless children or toddlers who also have lazy eyes.
In such cases, you can try and coax them to stay in the right position. When the time comes, you can go for the perfect photograph.

